About


This is an example page. It’s different from a blog post because it will stay in one place and will show up in Actor-lab was a parallel, object-oriented control language designed to introduce the ideas of control technology and robotics. Actor-lab was designed to make the teaching of control technology possible in classroom settings where, after a general introduction by the teacher, year 5-7 children worked by themselves in small groups with only peer support. The language and the interface were designed to represent the notion of input-process-output that was central to basic robotics and control technology. Its operation could be explained using the intuitively accessible metaphor of a cast of actors able to send messages to each other. The programmer’s role became one of playwright, writing scripts for the actors.

The theoretical ideas underlying Actor-lab were derived from the event-driven, message-passing computer languages that began with the actor-based languages devised by Hewit. Practical inspiration was provided by HyperCard and, to some extent, by LabVIEW.
The first version was developed in HyperCard (in 1992), but the problems associated with having to input scripts via the HyperCard editor meant that it was only usable with year 7 children.
Concepts
There were three key ideas to communicate to students starting to work with actor-lab:
the role of the programmer as playwright in actor-lab, developing scripts for a cast of actors.
the input => process => output model of control technology, i.e. that the basic cycle of actor-lab involved real-world events being transformed by the,
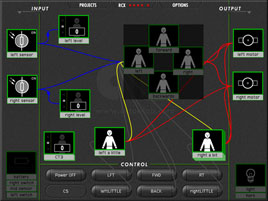
INPUTS and sent on as messages (or as a flow of data) to, ACTORS which in turn created a flow of messages to each other and on to, OUTPUTS that brought about real-world events,

and that messages could either be sent immediately or after some delay.

Interface

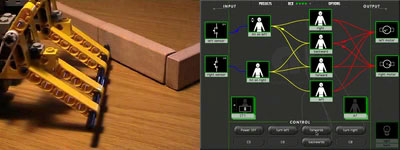
The language and interface of actor-lab were designed to represent, in an intuitively accessible way, the notion of input-process-output, which was central to basic robotics and control technology. The states of the sensors and outputs were updated continuously, and the flow of messages was represented as a stream of particles.
Clicking on an object halted the program and opened an edit window for entering scripts.
Little or no typing was required to use actor-lab, and spelling mistakes didn’t matter. The graphical interface meant that you couldn’t make a syntax error (though it didn’t guarantee that your program would always do what you expected!).
Objects

Light (and temperature) sensors could send a message (or several messages) when their input level fell below (or rose above) the value set by the slider.
Initially, it was best to think of actors as simply responding to BEGIN messages, which caused them to send BEGIN messages to other actors or specific messages to output objects, like turning on a light. The only complexity at this stage was that messages could be sent immediately upon the actor receiving a BEGIN message or after a delay.
The edit window for the output objects allowed testing. It was often necessary to test motors to determine the relationship between clockwise/anticlockwise and directions like up/down, forward/backward, etc.
Models

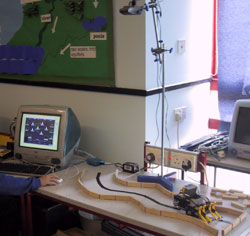
A key difference between actor-lab and most control languages for the RCX was that it maintained a constant link with your model. This had many advantages in terms of knowing what was happening as your program ran, but it did impose some limitations. The range of moving models was restricted to the area of a tabletop, and interference between RCXs could cause problems if you tried to use several in the same room. (See the details section and the manuals.)
You could use actor-lab to control any model that you connected to the RCX; it worked with all the input devices except for the rotation sensor. The projects covered in the download section included a cane crusher, a car park barrier, and a buggy that could find its way through mazes and follow lines.
Classroom
Control technology/robotics was a highly motivating and rewarding part of the curriculum for students. The ideal way to discover control technology was to build a model and then learn how to control it by experimenting, and this was quite possible in the context of after-school clubs with extra adults around to help the teacher. Unfortunately, control technology was quite difficult to teach in the ‘whole class’ environment with normal levels of support and equipment.

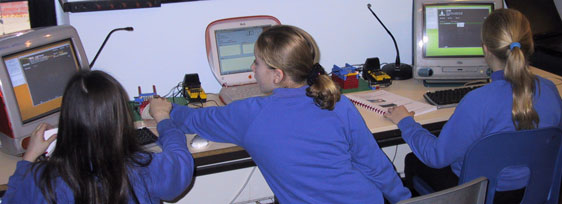
Actor-lab was designed to be used by a teacher working with a whole class, relying on the children to help each other to a large extent. A set of problems with student manuals could be found in the downloads section, and they had undergone two years of trials with year 5-7 students. The manuals were initially fairly directive but became more open-ended. It was probably best to use a system connected to an overhead projector to introduce the key ideas to the whole class.
(An advice system that helped to identify common problems had been developed to aid peer-tuition, but was not yet ready for release.)